I realized long ago that in the hospitality industry we are not here just to deliver the cake, dessert, or food – we deliver happiness. It’s not about the cake, it’s about the experience. And in this case, the people which make the experience happen!
I’m aware it has been a long time since I have posted. The reason is I have been submerged in my dream job – teaching full time as a baking & pastry instructor at the Southern Alberta Institute of Technology (SAIT), the same college which I graduated from over 10 years ago.
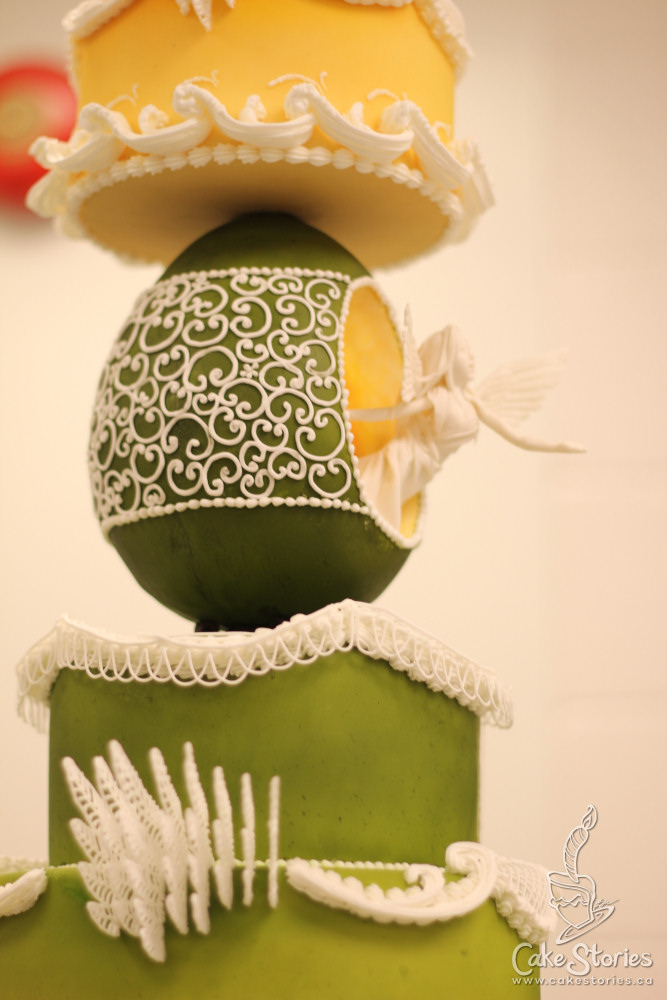
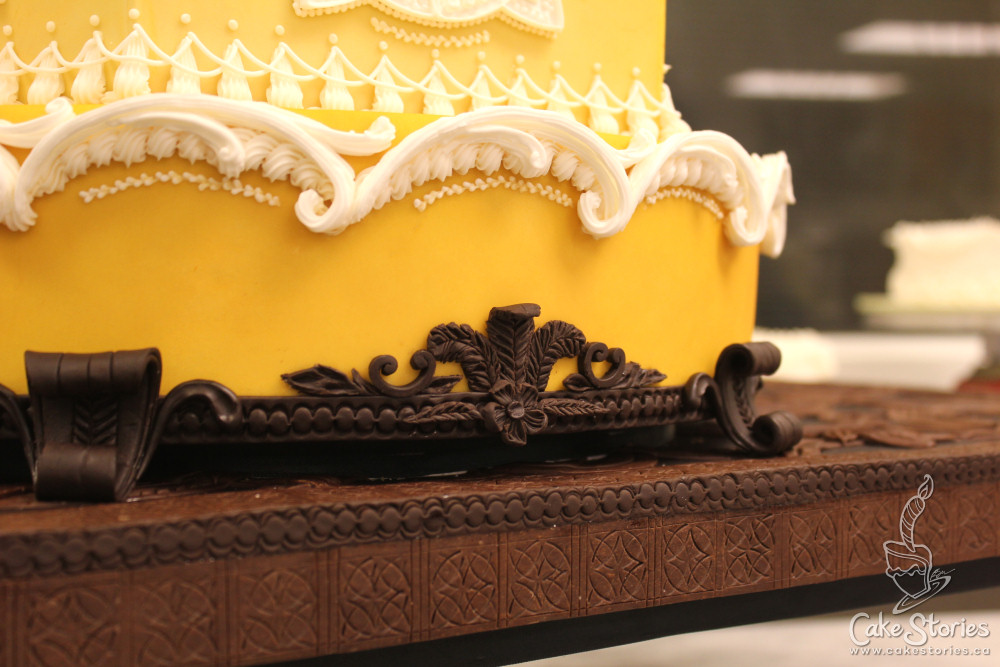
As we near the end of the year, I tend to self-reflect. Here I wish to share with you one of the most meaningful cakes I had the opportunity to be a part of last year – the SAIT Centennial 100th birthday cake.
This cake project involved:
- 70+ volunteers; including students, instructors, and community & industry members
- 14 tiers, with a total height of 7+ feet tall
- Serving 2000+ people from this cake & side serving cakes
- An estimated weight of 350+lb in the centre ‘tower’ of cake
- An overall weight of approximately 640+ lbs including the front sheet and back mountain sections
Planning to Make a Big Cake
There have definitely been cakes I’ve made without planning. But when others are involved, I believe it really helps to have a tangible (a.k.a. written or visual) plan. To me, a plan is a way of communicating ideas and actions to others, instead of it all staying inside my head. For a cake, this is usually in the form of sketches, reference photos, schedules, and to-do lists.
For me, the process of planning for a large cake usually involves:
- Identifying the parameters
- Collecting all relevant ideas and references.
- Drawing the initial sketch, followed by refinements and design approval.
- Creating a to-scale diagram or in this case, cardboard model. I cannot emphasize the importance of this!
In regards to the parameters, I had to first determine the purpose of the project. I was torn between exclusiveness versus inclusiveness – was it better to work with a small group of highly skilled volunteers or a larger group of volunteers with varying skills levels? I tried to pinpoint the purpose and essence of this cake, all while battling my ego. In interacting with the SAIT party planning team, and learning about the views of SAIT, two themes started to stand out to me – friendliness & collaboration. I decided to allow anyone to help with the cake and started welcoming any volunteers who were interested.
Early in the year, we started collecting ideas for the cake. We sent out a message out to all the staff and faculty of SAIT asking for what they would like to see on their Centennial Cake, and got some great ideas representing the different trades and technologies at SAIT. I think one of my favourite ideas was a superhero in a cape called the Learning Man.
After, I held a planning session with interested past and present baking students. I’m not sure if was because of the method, or because of the people, but the ideas were very different from those collected from staff & faculty. They were immensely creative ideas, clearly from a student’s perspective, such as students enjoying treats such as Tim Horton’s coffee & lying in the grass eating chocolate bars, or students launching candles at the cake using a candle cannon.
I did notice many ideas, whether from staff or students, had one thing in common – they involved people. At first, I had difficulty welcoming this. People in the form of edible sugar figures are notoriously difficult and time consuming to make. But the number of volunteers interested in helping with the cake grew, and soon I realized this was perfect. The detail and number of figures could easily be adjusted to the number of volunteers and their skill level.
I believe if it can work on paper, it can work in person. The initial sketch is always a rough one for me, often happening late at night in a spontaneous and creative manner, with the main focus being the overall shape or “feel” of the cake. From there, refinement happens as specific ideas are incorporated and the sketch is shown to others for input and approval.

The very first sketch, in blue ink.

One of many refined sketches, after specific details are added.
I believe the more accurately the end goal can be visualized, the easier it is to work towards. Thus came the life-sized sketch, then cardboard model. This made many things easier to figure out, such as the:
- size and number of figures needed
- the height of the internal structure
- the overall height of the cake
- width and height of each cake board
- width and height of each tier
- how much cake to bake
It also made great visuals for everyone involved!


I like to challenge myself and wanted to make this the tallest cake I have ever made. In the initial brainstorming, I was confident I could make a cake upwards of 20 feet tall, and there was a very real conversation exploring the use of scaffolding and a bucket truck, which I soon realized was beyond the scope of the parameters. Shortly after I scaled things back after determining these limits, which was a good thing as I can be known to get carried away. 😊 One of my philosophies is to dream big – don’t just reach for the stars, reach for the galaxies; and if I land partway there, I’m happy.

Did you know 80″ doors and 10 foot PVC can fit in a Toyota Corolla?

Fellow instructors helping with the cake board. Here pieces of wood are added to the bottom of the board as a footing to make it easier to lift if there is weight on top.
My focus was still to create an emotional impact, a.k.a. wow factor. To me, a wow factor is about creating a memorable feeling of a once-in-a-lifetime experience. I felt the cake needed to have enough presence to suit the large hall it would be displayed and decided to increase the size of the cake design at least twice. With the replica, I felt the wow factor was reached when it was tall enough to tilt my head back to view it.
Starting with Dry Decorations
I learned quickly to adapt to the availability and schedules of others – it was their time which determined what would get done each day. It was interesting to learn about how unpredictable and last-minute everyone’s lives were, with many not knowing where they had to be until the day of.

What also surprised me was my loss of creativity. This was due to my thoughts consumed by planning, coordination and time management. As a naturally creative person, this was hard. It felt like the creative part of my brain shut off. I had to focus on organizing work and rely on others to develop the creative ideas.
I had to accept it was not my job to be a technician, but to be the project manager. There was no other person better suited for this. Every minute I spent working on the details of the cake was a minute I could be coordinating the work to someone else. This was a challenge as I often felt in my life that I am a technician. My skill is what got me here, and skill is what I can always fall back on. I had to learn that my purpose was to pass on skills to the students and volunteers by allowing them to do the work. And the more work I delegated to others, and the more I stepped back, the more meaningful the project became.
An excellent idea contributed was to have a hundred figures because it was a hundredth birthday. Making the figures was probably the most time-consuming. For consistency, I created polymer clay figures which were then cast into a re-meltable mold making medium. Our team of volunteers would then use these molds to create the bodies, then dressing them as needed. And what really gave a sense of diversity were the hair different styles! By the end of the summer, we had well over a hundred dried sugar figures, tucked away safely in airtight storage.

My buddy. Made of polymer clay.

The first trial of the custom mold, made using a product called Composi-Mold.


Linnea Neels, figure making extraordinaire!

Amethyst Thompson & Nicole Padley, fellow members of the hair & accessory team among many other things!

Ekaterina creating a miniature version of the cake!

SAIT President, Dr. David Ross.

Kim Hambley creating figures.


Leading up to the Day of the Event
Most elements of this cake were built on previous experience from cakes I had done before, such as the globe, mountains, topsy-turvy shape, large sheets of cake, buildings, and figures. There were however definitely risks involved, such as the use of electronics and being the tallest & heaviest cake I had ever been a part of.
As we neared the day of the event and things began to build together, I had one frazzled weekend where the weight of the cake far exceeded what I had first planned, and I questioned the stability of the cake boards. We found ourselves stacking multiple bags of flour on top of the boards to observe if they would collapse. Luckily, they only compressed about 1mm, even with about 500lbs stacked on top overnight.

Sometimes there is too much cake in the cooler to get out & one has to compromise.

Rebekka and Vicky doing a dry run of the stacking. This is where we realized things were getting heavy.

After weighing the tiers we could, and estimating the rest, we realized the centre tower of tiers was over 350lbs, and the overall cake weighed over 640lbs!

Testing to see if our cake boards would compress or not.

Moving forward with the world.

The to-do list looking a little chaotic leading up to the event.

The night before, Rob Hambley, among many others, starting to place figures on the cake. This was a late night.
I was so happy on the day of the event – most of the planning paid off. Everything fit together like a streamlined puzzle. Asides from a few small decorations falling, nothing major fell down and nothing melted.

Madison Nussbaum, Amethyst & Rebekka helping to assemble the cake, among many others.

Surrounded by some incredible individuals here. This is only a fraction of those who helped with the cake.

(Photograph courtesy Rebekka Lenz)

(Photograph courtesy Rebekka Lenz)
The cake had a strong presence. It was a clear collaboration. There was the smell of buttercream and cake. It looked like a balancing act. There were small delightful details for the crowd to discover, such as miniature slices of cake enjoyed by the figures, or the school’s mascot. I was thrilled all the electronics worked, such as the light for the candle, switchboard, and the spotlight for the mayor. The Learning Man, and Learning Woman were there. And the cake was of a height where you had to tilt your head up to take it all in.


(The above four photographs are courtesy of Rebekka Lenz)
As always, my favourite part was to see the cake get dismantled, cut up, and served. Not only did people get to see the cake, they got to eat it. And many children enjoyed the 100+ sugary figures.
(Footage courtesy Nolan Moskaluk)
Reflection
What were the proudest parts of this project for me? I estimate I worked on less than 5% of the actual cake and decorations. What I did on cake included:
- modelling & baking the polymer clay figures used for casting the molds
- creating the faces for the figures of the SAIT president, executive team and a few other special requests
- smoothing the buttercream on the Heritage Hall and Aldred buildings,
- assembling the internal structure for the top three tiers & touch ups for these tiers
I was also pleased that no styrofoam used in the making of this cake, however, some of the bottom tiers contained rice cereal treats – making it a truly heavy cake.
Most of all, my proudest part was my ability to trust a group of volunteers to make this cake from start to finish, ending with assembling the cake, final decorations and serving the cake. They had it handled, they knew what had to be done. I didn’t even have to be there, which is exactly what I wanted. I wanted it to be their experience, their day, not mine.
I am glad I to decided to welcome as many volunteers as possible. Not only did this disperse the workload (especially with so many unpredictable schedules), each person helped create more conversation about the cake, sharing their story of their involvement with others.
I learned deeply about myself and my weaknesses: I don’t always respect my own time, I doubt myself, and I often feel grossly unorganized. On the other hand, I learned about my strengths: I remember details about people, I adapt according to needs, and I consider myself compassionate.
I noticed some areas of improvement in planning, management, and communication on my behalf. This project taught me to be a better team lead and the importance of clearly communicating my expectations. There was no one to do quality control other than myself. On the day of the event I think I could have been more prepared for the publicity; managed the serving of the cake in a more streamlined way; and been more intuitive in delegating, especially as the energies of the team and myself became depleted later on in the evening.
This cake taught me to predict the unexpected. I didn’t know who would sign up, who would pull through, or that I would even have this task. Sometimes in my mind, I plan things to go one way, and then they take on a life of its own and evolve to become completely different. Many students surprised me with their drive and capacity, with often matched or exceeded my own.
I maintain my belief it is people who create meaning in this world. Being in the hospitality (and now, education) industry I am in essence, servicing people. This cake was representing the people of SAIT, made by the people of SAIT, to feed the people of SAIT.
After the cake was done I was often asked if I was happy it’s over. If anything, I was sad. Having a large project in my life has been my status quo. I missed the one-on-one interactions, the thrill of doing something different, and missed working collectively together to reach a common goal.
But I know from experience it’s necessary to take these breaks between projects to rejuvenate and step away and to miss them, yearn for them, so I remember why I love the things I love. What the next project will be, who knows, but I know it will be easier with the experience gained from this cake.
Here is a video which summarizes the process of the making of the SAIT Centennial cake:
(Footage by SAIT)
Feel free to check out my other writings as an educator at ingredientsforlearning.wordpress.com.