I’ve been thinking about pizza all week. Specifically, deep-dish pineapple pepperoni pizza! This is the follow post up to a very special cake – Pizza Cake: Part I. In this post, I’m going to describe some of the tips and techniques that went into the making of the sculpted pizza cake:
- The Pizza Base
- Fondant Pepperoni
- Fondant Pineapple
- Fondant Cheese
Let’s start with some notes on the sculpted pizza base cake shape:
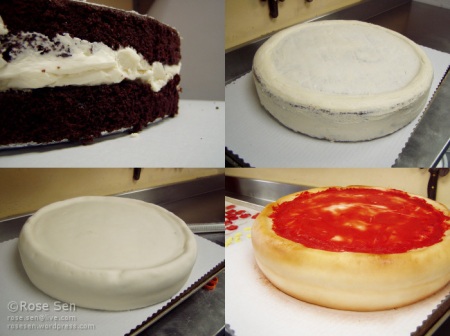
- I started with 2 round layers of cake, less than 1″ high. This time, it was moist chocolate cake with vanilla icing. (Remember to make an icing dam – I love swiss meringue buttercream for the dam – then fill with the desired filling.) The second layer of cake was placed ontop.
- The “crust” of the pizza was built up by piping a ring of swiss meringue around the edge. The entire cake was crumb coated, making it as smooth as possible
- Cake covered in fondant. Texture, lumps and bumps were added for realism.
- The cake was coloured. In this case, the cake was airbrushed with edible food colour using a combination of brown, orange and yellow. (This can be done using powdered colours too.) A very thin layer of icing was spread ontop, to represent the sauce. The icing was coloured using a combination of red, brown and orange for a more natural saucy colour.
Next came preparing the decorations. AKA, the toppings!
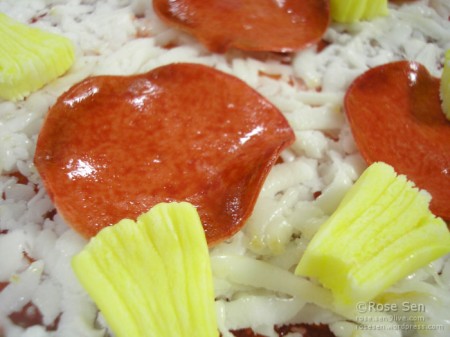
- The fondant was mixed into a “hot doggy” colour. Red, peach and brown. It was then rolled out as thin as possible, cut out circles, then edges were curled using a ball tool. The circles were let to dry.
- Then the pepperoni was painted with a layer of thinned red, peach, brown. For added texture, they were then dabbed with clean paper towel. After, the edges were airbrushed using brown food colouring. Lastly, shine was added using a thin layer of vegetable oil.
The Fondant Pineapple:
- A light yellow fondant was mixed. The colour was only partially mixed in for a slight marbling effect.
- A pineapple “log” was hand-shaped and then put into the freezer, just long enough to harden.
- After the fondant log had hardened in the freezer, uniform pineapple pieces were cut.
- Realistic texture added using a paring knife.
The Fondant Cheese:
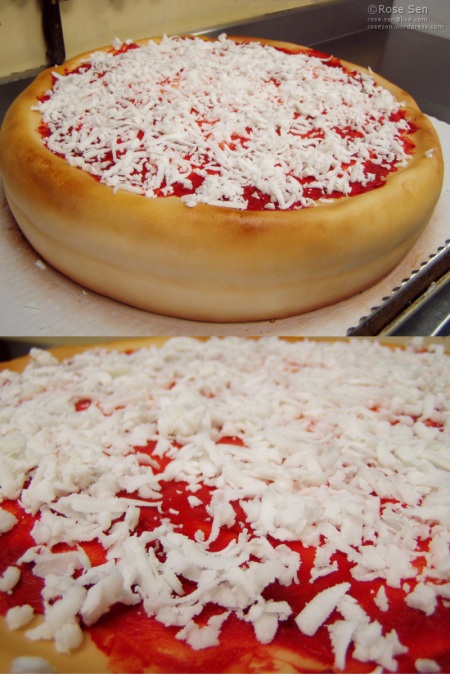
- A chunk of off-white fondant was frozen until hard. Cheese was grated on a cheese grater then immediately spread over the cake in a thin layer.
- Fondant cheese was melted slightly using a blowtorch.
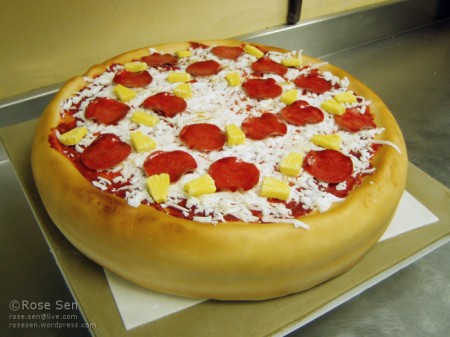
Putting it all together:
Check out Pizza Cake: Part I for more photographs of the cake in its entirety.


Great tutorial! I love how you did the pepperoni! The whole cake looks just like the real pizza..so cool! Thanks for sharing! 😀
Pingback: Pizza Cake – Part I « Cake Stories by Rose Sen
Love this. The cheese technique I really like 🙂
How did you get the “pizza sauce” so red?
The pizza sauce is a light layer of red-coloured buttercream. The buttercream was coloured using high-quality gel or paste colours.
Amazing…it came out so pretty